
Hydroponic cannabis growing is one of the most efficient, productive, and precise ways to cultivate marijuana indoors. By replacing soil with a carefully mixed nutrient solution, plants receive everything they need directly at their roots. This results in faster growth, denser flowers, and higher cannabis hydroponics yields. But how do you set up a hydroponic system for cannabis correctly? This guide covers everything: planning, system types, coco coir as a medium, nutrient management with pH/EC, technical setup, climate control, a step-by-step schedule, common mistakes, and a detailed FAQ.
1) Planning Your Hydroponic Cannabis Grow
1.1 Define Your Goals
Before buying equipment, be clear about your priorities. Do you want maximum yields? A simple beginner-friendly setup? Or a highly automated grow room? Your goals will influence which hydroponic cannabis system you choose, the size of your investment, and the complexity of your grow.
1.2 Measure and Prepare Your Space
Accurate measurements are essential. Check height, width, and depth of your grow area. Plan for air intake at the bottom, exhaust at the top with a carbon filter, and enough space for your reservoir. A waterproof floor and access to drainage are highly recommended.
1.3 Budget Realistically
A hydroponic cannabis setup requires more upfront investment than soil. Beyond the main system, you will need pH and EC meters, calibration solutions, LED grow lights, pumps, timers, fans, and backup parts. Always budget for redundancy: a spare pump or air stone can save your entire crop if something fails.
1.4 Safety First
Water and electricity are a dangerous combination. Mount sockets above floor level, use GFCI outlets, and install drip loops on all cables. A leak alarm, fire extinguisher, and first aid kit should be standard. Consider a backup air pump or small UPS to cover short power outages.
In hydroponic cannabis cultivation, it is essential to ensure safety when dealing with water and electricity.
2) Choosing the Right Hydroponic System for Cannabis
Different systems vary in complexity, control, and cost. Here are the most common hydroponic cannabis setups:
- DWC (Deep Water Culture): Roots suspended in aerated nutrient solution. Pros: Simple, productive, great for beginners. Cons: Vulnerable to power outages, water temperature sensitive.
- Ebb & Flow: Cycles between flooding and draining. Pros: Reliable, forgiving, scalable. Cons: Can lead to salt buildup in media.
- Drip Irrigation: Delivers nutrients directly to each plant. Pros: Flexible, automatable, excellent with coco coir. Cons: Risk of clogged lines, requires maintenance.
- NFT (Nutrient Film Technique): A thin film of solution flows over roots. Pros: Extremely efficient. Cons: Very dependent on uninterrupted power.
- Aeroponics: Roots suspended in air, misted with nutrients. Pros: Maximum growth speed and yields. Cons: Technically demanding, expensive.
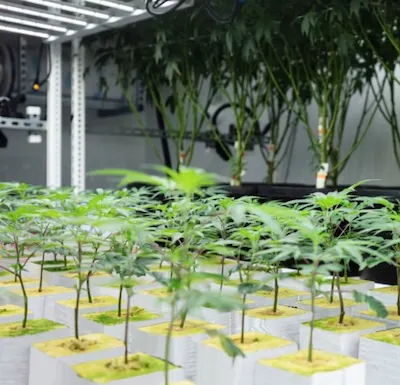
3) Coco Coir: A Beginner-Friendly Hydroponic Medium
Cannabis coco growing is one of the most popular hydroponic methods worldwide. Coco coir combines the benefits of soil-like stability with hydroponic precision. It is inert, meaning all nutrition comes from your nutrient solution, but its structure retains water and oxygen, creating an ideal root zone.
3.1 Preparing Coco Coir
Quality pre-buffered coco is best. If not, soak it in Cal-Mag adjusted water (pH ~5.8) before use to prevent calcium/magnesium lockouts. Always rinse thoroughly to remove salts.
3.2 Pot Size and Drainage
Use 2–3 gallon pots indoors. Ensure plenty of drainage holes and a runoff of 10–20% per irrigation to prevent salt buildup. Collect and discard runoff instead of reusing it.
3.3 Irrigation Frequency
Coco should stay evenly moist but not waterlogged. In vegetative growth, 1–2 irrigations per day are enough. In heavy flowering, increase to 2–3 daily feedings. Drip irrigation is the easiest way to keep coco consistently moist.
3.4 Nutrient Strategy in Coco
Because coco is inert, all nutrition comes from your solution. Maintain EC at 1.2–1.6 during veg and 1.6–2.2 in bloom. Keep pH between 5.8–6.2. Watch leaf tips: slight burn means you’re at the upper limit, so reduce slightly.
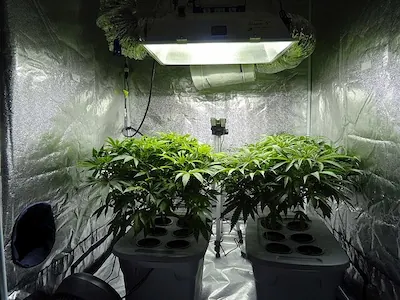
4) Technical Setup: Reservoir, Aeration, Lights
4.1 Reservoir Management
Choose opaque, food-grade tanks with lids to block light. Provide 2–4 liters per plant minimum. Install drain valves for easy changes. Keep spare tubing and connectors on hand.
4.2 Oxygen and Circulation
Roots thrive on oxygen. Use strong air pumps with multiple air stones, plus a circulation pump to keep nutrients evenly mixed. Reservoir temperature should stay between 18–21 °C (65–70 °F).
4.3 Lighting
Modern LED grow lights are efficient, cool-running, and full spectrum. Use bars or panels to cover the canopy evenly. Adjustable height and dimming allow phase-specific optimization. Maintain proper PPFD for each stage to avoid light stress.
4.4 Climate and Ventilation
Keep daytime temps at 24–28 °C (75–82 °F), slightly cooler at night. Humidity: 60–70% early veg, 50–60% late veg, 45–55% flowering. Use intake fans, exhaust with carbon filter, and oscillating fans for air movement.
4.5 Safety in the Grow Room
Mount ballasts and drivers off the floor, keep cables organized, and ensure circuits are protected. Water alarms and secondary trays can save you from costly leaks.
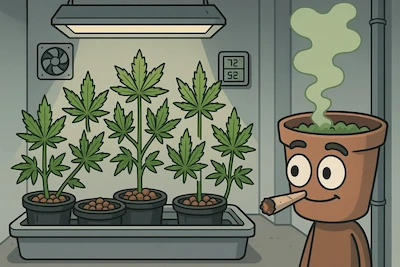
Even in homemade setups, basic infrastructure is required for hydroponic growing.
5) Nutrient Management: pH and EC
5.1 pH Control
Maintain a pH of 5.5–6.5. In veg, aim for 5.8–6.1; in bloom, 5.8–6.3. Outside this range, nutrient lockout occurs even if plenty of nutrients are present.
5.2 EC Levels
Start seedlings at EC 0.6–1.0, veg at 1.2–1.6, and bloom at 1.6–2.2. Increase gradually and observe plant response. Avoid sudden jumps in concentration.
5.3 Mixing the Nutrient Solution
Use clean water, ideally RO. Add Cal-Mag first, then base nutrients, then additives. Stir thoroughly. Test EC and pH immediately and again after 15 minutes.
5.4 Reservoir Maintenance
Top up with water daily to stabilize EC. Replace the entire solution every 7–10 days. Keep records of all measurements for consistency and troubleshooting.
6) Feeding Schedules and Growth Stages
- Seedlings/Clones: pH 5.8–6.1 | EC 0.6–1.0
- Veg (early): pH 5.8–6.1 | EC 1.2–1.4
- Veg (late): pH 5.8–6.1 | EC 1.4–1.6
- Bloom (weeks 1–3): pH 5.8–6.2 | EC 1.6–1.8
- Bloom (weeks 4–6): pH 5.8–6.2 | EC 1.8–2.0
- Bloom (weeks 7–8+): pH 5.8–6.3 | EC 1.8–2.2
7) Step-by-Step: First 4 Weeks
- Week 1: Assemble dry, water-test for leaks, then add seedlings/clones. Use mild nutrient mix (EC 0.8–1.0, pH 5.8).
- Week 2: Increase EC slightly (1.2–1.4). Begin light training (LST). Maintain steady climate and check roots daily.
- Week 3: Push PPFD, maintain EC ~1.6. Start topping or SCROG if desired. Ensure runoff is 10–20% to avoid salt buildup.
- Week 4: Stabilize values. Prepare for bloom switch by increasing potassium and phosphorus in nutrient solution.
8) Common Mistakes and How to Avoid Them
- Over-regulating pH: Adjust once daily; chasing exact numbers causes instability.
- Overfeeding: Always start light; increase gradually to avoid nutrient burn.
- Reservoir too warm: Keep solution 65–70 °F (18–21 °C).
- Poor oxygenation: Use strong pumps and clean air stones.
- Clogged drip lines: Install filters and flush regularly.
- No backups: Always keep spare pumps, timers, and tubing.
9) Troubleshooting Hydroponic Cannabis
pH Drifting Too Much
Calibrate your meter, check mixing order, and clean the reservoir. Make smaller adjustments.
EC Rising Unexpectedly
Caused by evaporation or salt buildup. Top off more often and schedule reservoir changes.
Nutrient Lockout
Symptoms: deficiency signs despite feeding. Fix: adjust pH, flush system, restart with lighter mix.
Root Rot
Caused by heat, low oxygen, or biofilm. Keep solution cool, highly aerated, and opaque to light.
Light Stress
Curling or bleaching leaves signal excessive PPFD. Raise or dim lights for balance.
The key to successful hydroponic cultivation lies in well-optimized grow schedules.
Conclusion: Consistency Equals Results
Hydroponic cannabis growing rewards precision and consistency. With a solid hydroponic grow room setup, correct pH/EC, and reliable equipment, you can achieve higher cannabis hydroponics yields and cleaner, stronger buds. Whether using DWC, aeroponics, or cannabis coco growing, hydroponics is the future of cannabis cultivation.
FAQ – Hydroponic Cannabis Systems
What is the easiest hydroponic system for cannabis?
DWC or coco coir with drip irrigation, as they are forgiving and productive.
How often should I change the reservoir?
Every 7–10 days, with daily top-offs using fresh water to stabilize EC.
What pH and EC should I maintain?
pH 5.5–6.5. EC 1.2–1.6 veg, 1.6–2.2 bloom, depending on strain and light.
Do I need reverse osmosis water?
Not mandatory, but RO water makes nutrient mixing more consistent and prevents salt buildup.
Is coco coir really good for cannabis?
Yes, coco is inert, easy to manage, and perfect for beginners and pros alike.
How can I prevent root rot?
Keep solution 65–70 °F, ensure strong aeration, and keep the reservoir light-proof and clean.
What are signs of overfeeding?
Brown or burnt leaf tips indicate too much; reduce EC slightly and monitor.
Is hydroponic cannabis stronger than soil-grown?
Often yes, thanks to precise feeding and better terpene/cannabinoid expression.
Can I grow hydroponic cannabis year-round?
Yes, indoor hydroponics allows continuous growing independent of season.
What is the average cannabis hydroponics yield?
On average, 20–30% higher than soil, depending on genetics, light, and grower skill.